Porch & PatioNo. 9923 · The 2026 edition
Fabulous Halloween Witch Crashing Decoration
Turn your porch into a crash landing zone with this DIY witch decoration that looks like she flew right through the wall!
Our own summary of the original — the full post and photos live at wp.me.
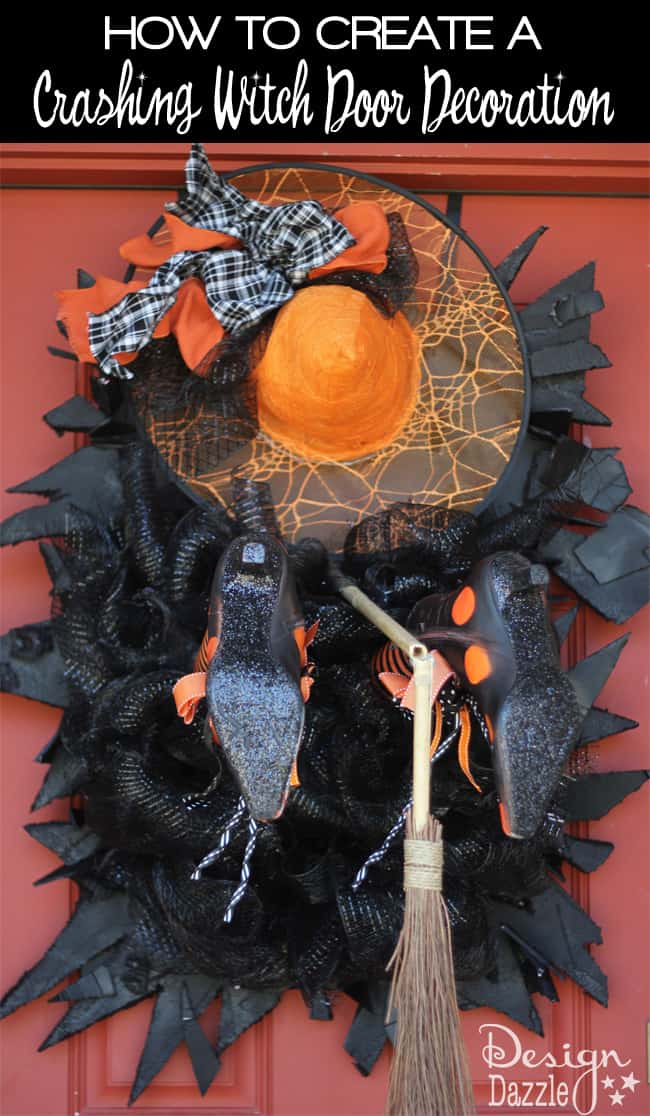
Create a dramatic Halloween display by building a witch who appears to have crashed through a door. Using foam boards, a pool noodle, tights, and a broom, you'll craft legs, a broken-door base, and a mesh skirt. The finished witch stands securely with her hat and boots, making a spooky statement.
You'll need
Directions
- Take three sheets of black foam board and glue them together with a hot glue gun, using plenty of glue and making sure the edges are aligned. Once dry, center the thick board on your wall position and use two wreath hangers to mark where you’ll hang it. Poke holes about 4 inches down from the top.
- On another foam board sheet, use chalk to mark three equal sections, then cut along the lines with a hand saw or scissors. Stack and hot glue these three pieces on top of each other. Repeat this entire step two more times so you end up with three separate thick stacks of foam board.
- Take a pool noodle and use it as a template to trace two circles on the first foam board stack, making sure the noodle is centered. On the second stack, trace the circles half an inch higher than the first; on the third stack, trace them another half inch higher. This shifting creates the angle needed for the legs.
- Carefully cut out the traced circles with scissors. After all holes are cut, stack the three foam board layers and hot glue them together into one very thick piece. You’ll see the holes are offset by half an inch between layers.
- Cut the pool noodle in half (or shorter) so you have two equal lengths. Insert a dowel into the center of each noodle half to add reinforcement.
- Slide a Halloween tight over each noodle, then cut and tie the tights to the correct length. These covered noodles will become the witch’s legs.
- Push the legs through the holes in the foam board stack. The fit should be tight, which is good because it keeps the legs stiff and secure.
- Trim the foam board stack so its width is smaller than the base. For a 20-inch-wide base, cut 4 inches off each side to make it 12 inches wide. Then drill holes about an inch from the top corners and thread doubled-over wire through them. This wire will later attach the legs to the base.
- With the legs secure, start decorating the base. Cut triangles and odd shapes from extra foam board or scraps, and also cut zigzags and random pieces from the rigid foamular insulation. Hot glue these pieces around the base to create a broken door effect—the insulation will soften slightly with the heat. Apply a generous glob of glue and press the piece in place for 15–20 seconds.
- Spray paint all the insulation and foam fragments with flat black Krylon spray paint. This type of paint won’t eat away the foam.
- If using witch boots, slide them onto the legs. (You can find instructions elsewhere for making your own.) Add extra stuffing around the ankles to ensure a snug fit.
- Once the spray paint is dry, drill or cut two holes into the base about 8 inches down from the top. Use the wire from step 8 to attach the legs to the base, pulling tight. Then hot glue a baking pan under the legs for extra support, with the open side of the pan secured to the base.
- Cut wide mesh ribbon into many short segments. Gather each segment loosely and tie it in the middle with a pipe cleaner to form a little bow. Repeat until you have enough to cover the skirt area—I used almost a whole roll.
- Hot glue the mesh bows all around the legs, covering the base and pan completely. Be careful to only glue the lower part—use a spoon to push bows down if needed. Keep the top area free of bows because that’s where the hat will go.
- Stuff the witch hat with batting or crumpled newspaper. I glued an extra foam piece over the hat opening to keep the stuffing in, which also made it easier to attach. Glue the hat onto the base, add a large Halloween bow to the brim, then snap the broomstick in half (leaving a small connecting piece or reinforcing with tape) to show she crashed. Insert the broom into a hole drilled in the foam base.
More photos
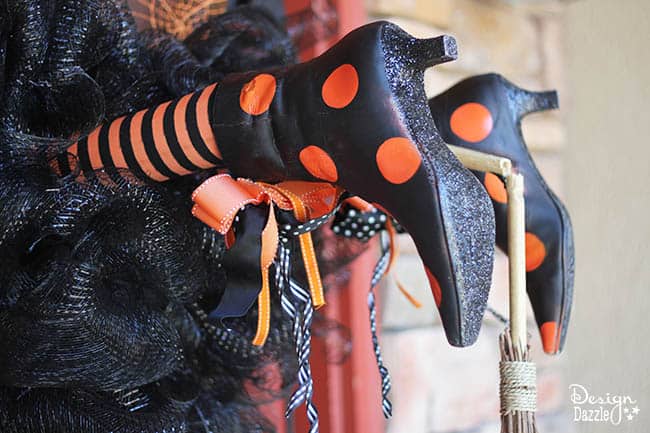
Photos hosted by wp.me.



:max_bytes(150000):strip_icc()/GettyImages-1432736508-43d6a0df230e4778a248ada4fa634e9c.jpg)