Classic Jack-o'-Lantern FacesNo. 2936 · The 2026 edition
How to Make a Jack Skellington-Inspired Pumpkin
Transform your pumpkin into a Nightmare Before Christmas masterpiece with this Jack Skellington-inspired DIY!
Our own summary of the original — the full post and photos live at hgtv.com.
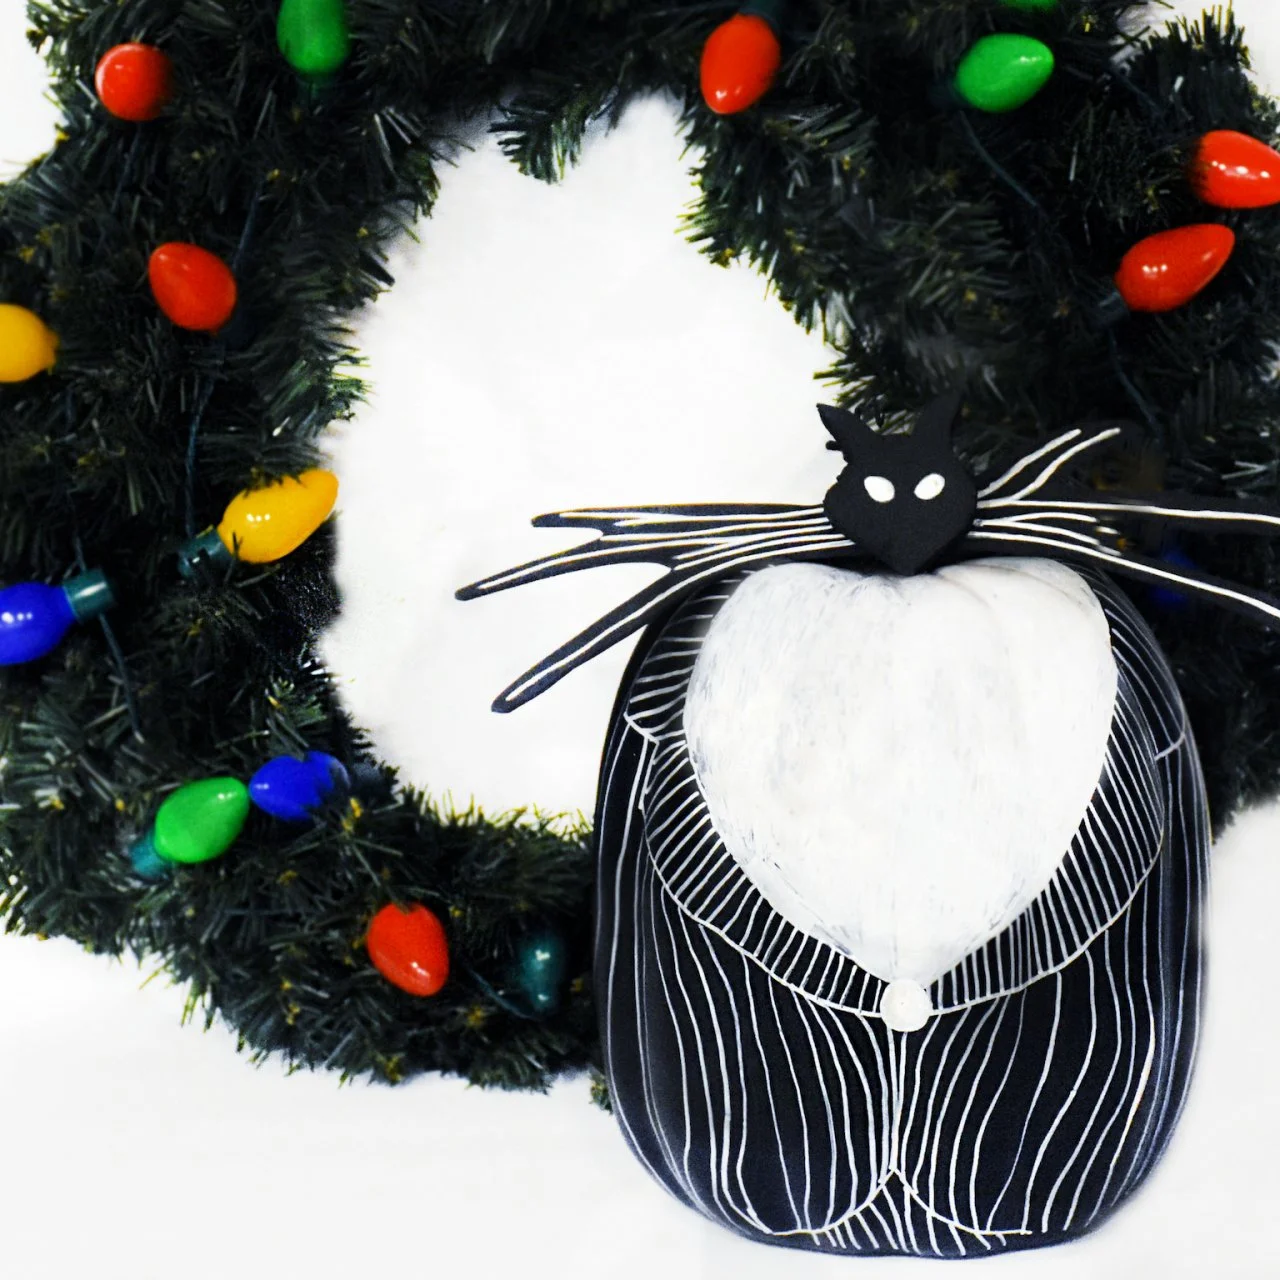
This project turns a black pumpkin into a Jack Skellington design with a painted suit and foam bat accessories. You'll use basic craft supplies to create the iconic look, then top it off with bat wings and head. Perfect for Halloween and even adaptable for Christmas with a Santa hat.
You'll need
Directions
- Use a pencil to lightly sketch a blazer design on your black pumpkin. Mark where the white shirt will go, the lapels, a single button, and the suit's pinstripes. If needed, erase and redraw until satisfied.
- Paint the shirt section with white paint. Let it dry completely before working on the suit outline to avoid smudging. Then, using a white oil-based paint pen, draw very thin pinstripes for the suit and fill in the circle for the button.
- While the paint dries, create the foam accessories. Grab black craft foam sheets and a pencil to sketch out the bat wings and bat head shapes.
- Cut out the sketched shapes with scissors. In the center of the wing piece, cut a small hole so it can later slide over the pumpkin's stalk.
- Using a pencil, draw thin white lines on the bat wings resembling pinstripes, and sketch eyes on the bat head. Trace over these pencil marks with the white paint pen. Work slowly and let each section dry to prevent smudging.
- Once the foam pieces are dry, assemble them. Slide the pumpkin stalk through the wing hole so the wings sit like a hat on top. Then use a hot glue gun to attach the wings first, and layer the bat head on top of the wings.
- Display your finished pumpkin for trick-or-treaters. After Halloween, you can add a Santa hat to turn it into a Christmas decoration!
More photos


Photos hosted by hgtv.com.


:strip_icc()/pile-pumpkins-56cb4f61-f5d8bf195acc426183dbae124404f720.jpg)