Paper CraftsNo. 5740 · The 2026 edition
How to Make a Paper Pumpkin
Transform simple craft supplies into a festive autumn decoration with this easy paper pumpkin project. Perfect for Halloween decor or classroom crafts, this guide walks you through creating a charming
Our own summary of the original — the full post and photos live at onelittleproject.com.
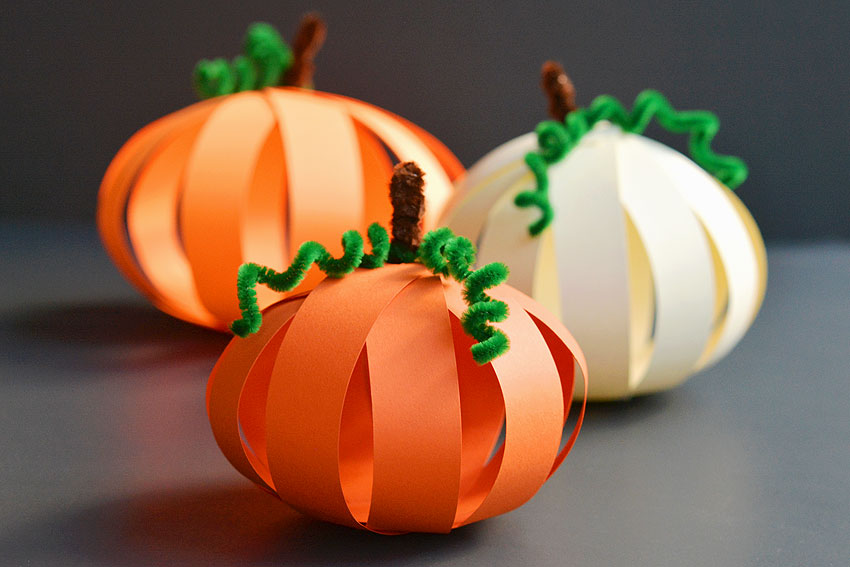
This tutorial outlines the process of crafting a decorative paper pumpkin using orange cardstock, pipe cleaners, and a paper fastener. The instructions detail how to prepare the cardstock strips, assemble them with a fastener, create a stem and vines from pipe cleaners, and arrange the final product for a festive display.
You'll need
Directions
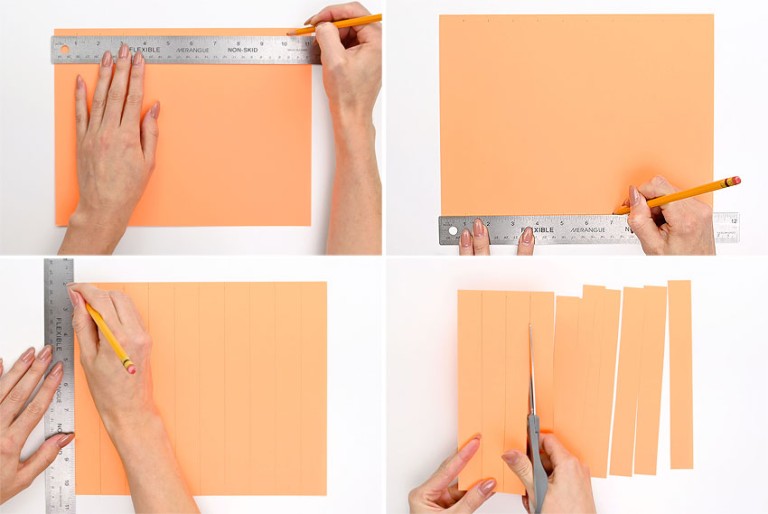
- Measure and mark points at every inch interval along both the top and bottom edges of the long side of your orange cardstock. Connect these marks with straight lines using a ruler, then slice along each line to create eleven separate strips.
- Stack the strips neatly and use a hole punch to create openings at both ends of each piece. You can punch multiple strips simultaneously to save time.
- Align the punched strips into a uniform pile and insert a paper fastener through the holes at one end of the stack.
- Secure the fastener by closing it tightly, which will hold all the paper strips together at that end.
- Position the fastener so its rounded head faces upward, then fan out the strips so they are distributed evenly around the center.
- Take a brown pipe cleaner and fold it exactly in half.
- Shape the folded pipe cleaner into an L-shape, ensuring both ends point upward. Lift one paper strip and thread the pipe cleaner ends through its hole. Place the next strip on top and repeat this process until every strip is threaded onto the pipe cleaner.
- Pull the pipe cleaner through the strips until only about one inch remains inside the bundle.
- Unfold the pipe cleaner inside the pumpkin to create a loop, twist it several times to tighten, and then bend it at a right angle so it lies flat against the strips. Fold the stem portion on the outside in half and wrap the remaining pipe cleaner around it to add thickness.
- You will now have a short stem with an internal hook that keeps the paper strips secured.
- Place the center of a green pipe cleaner directly over the base of the stem.
- Wrap both sides of the green pipe cleaner around the brown stem a few times to attach it securely.
- Wrap each loose end of the green pipe cleaner around a pencil to curl them into vine shapes.
- Adjust the paper strips so they are spaced evenly around the pumpkin's circumference.
- Your paper pumpkin is finished and ready to display.
More photos

Photos hosted by onelittleproject.com.