Spooky ForestNo. 1968 · The 2026 edition
Pastel Halloween Decor: Ombre Skull Tree Tutorial
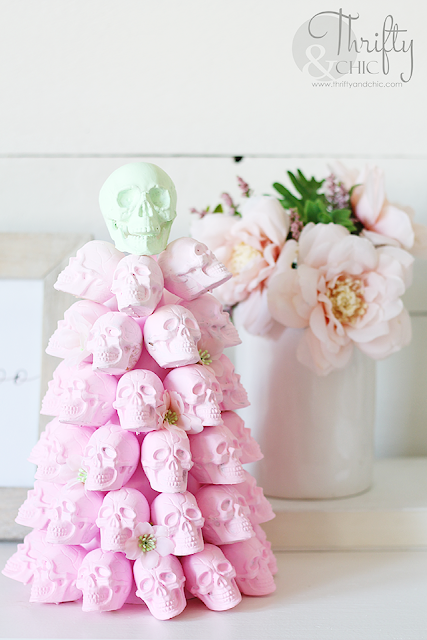
Add a soft and spooky touch to your Halloween decor with this pastel ombre skull tree.
Our own summary of the original — the full post and photos live at thriftyandchic.com.

This tutorial guides you in making a pastel ombre skull tree using a paper mache cone, painted skulls in graduated pink shades, and a green skull topper. The skulls are arranged from darkest to lightest, and small flowers fill the spaces. It's a charming, non-traditional Halloween centerpiece.
You'll need
Directions
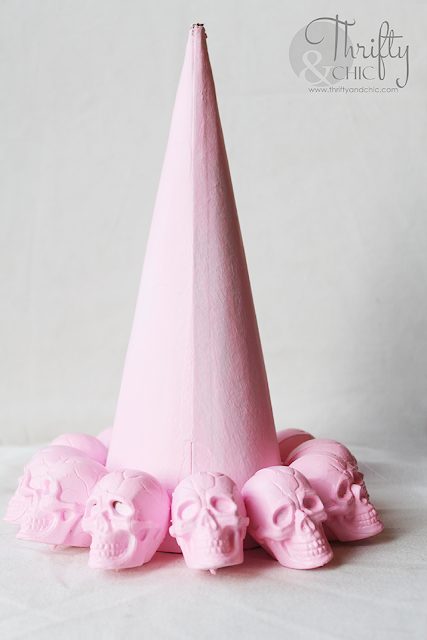
- Mix Pink Explosion and Snow White in equal parts to get a pastel pink. Paint the paper mache cone with two coats of this color. Then paint the skulls in batches: the first 12 skulls with the same 1:1 mix; then 11 skulls with 1 part pink to 2 parts white; 9 with 1:3; 7 with 1:4; 6 with 1:5; and finally 4 skulls with 1:6. Give each skull two coats and let them dry completely.
- Apply hot glue to the back of each skull and attach them to the cone starting from the bottom, working around in circles. Keep a straight line in the front where the skulls align perfectly. Continue layering upward, using the darkest pink skulls at the bottom and transitioning to lighter shades as you go.
- For the topper, mix Green Energy and Snow White in a 1:2 ratio (one part green to two parts white) and apply two coats to one medium skull. Enlarge the hole on the bottom of the skull so it fits over the tip of the cone, then place it on top.
- Finish by tucking a few small pastel pink flowers into the gaps between skulls for an extra decorative touch.
More photos


Photos hosted by thriftyandchic.com.
:strip_icc()/GettyImages-1401689130-a3be9dbfd95a45d8a2e7b42cfaeeb967.jpg)