ClownsNo. 1450 · The 2026 edition
Terrifier Makeup Tutorial Art The Clown (From Scratch)
Transform into Art the Clown from Terrifier with this complete makeup tutorial using prosthetics, body paint, and simple special effects.
Our own summary of the original — the full post and photos live at youtube.com.
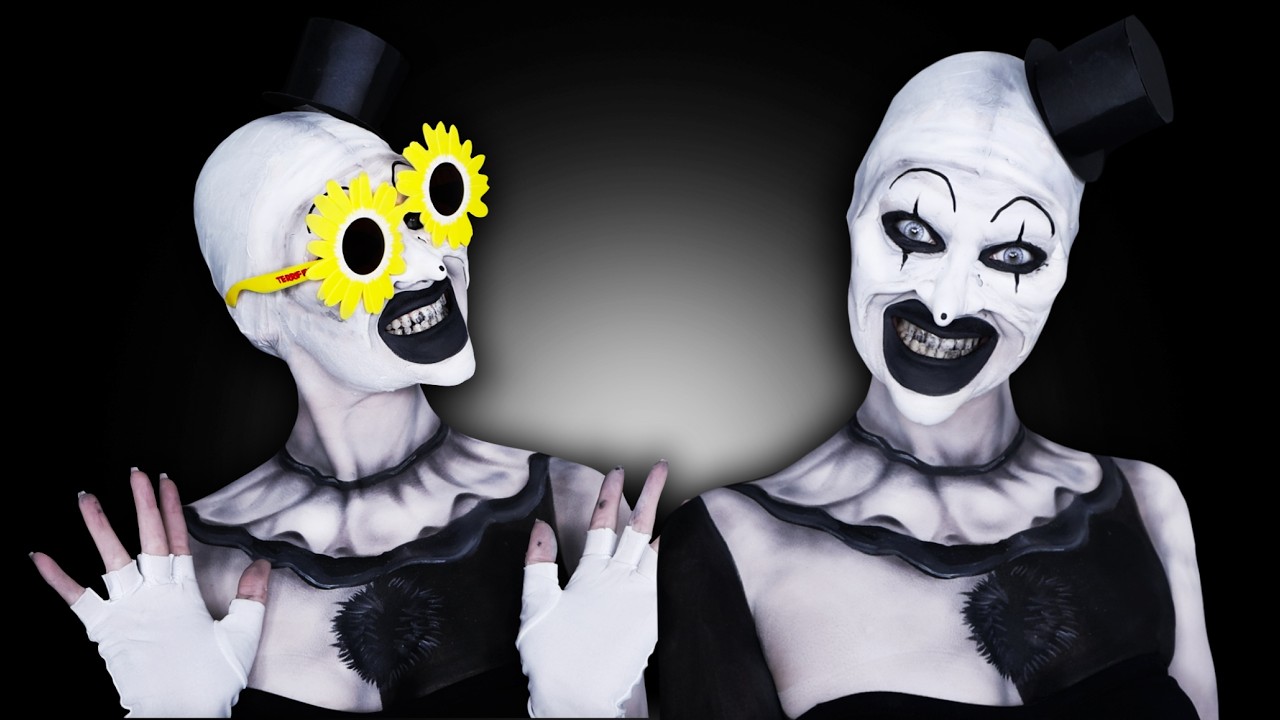
This step-by-step guide walks you through creating Art the Clown's terrifying look from scratch. You'll use foam clay, a bald cap, and prosthetic adhesive to build the structure, then apply white and black body paint with grey shadows and eyeliner for the signature eerie features. The tutorial also covers gluing down eyebrows and painting teeth for a fully convincing effect.
Directions
- Start by using Foam Clay to build up prosthetic features, but keep it off your bare skin as it's not meant for direct application.
- Apply Monster Latex from Spirit Halloween to blend the edges of the foam clay and create a seamless surface.
- Use Pros-Aid adhesive to secure any prosthetics or bald cap edges firmly to your skin.
- Put on a Graftobian Bald Cap to cover your hair, pressing it down smoothly with Pros-Aid along the hairline.
- Paint your entire face and neck with Madeyewlook Body Paint in the shade Yeti for a pale base.
- Use Madeyewlook Luxe Makeup Brushes to apply and blend the body paint evenly.
- Add dark shadows and outlines with Wolfe FX Body Paint in Black for depth and definition.
- Layer Morphe Grey Eyeshadows over the black paint to create a grungy, textured look.
- Draw precise lines and details using NYX Pencil Eyeliner, such as the exaggerated smile.
- Use Disappearing Purple Washable Gluesticks to glue down your eyebrows, then paint over them.
- For the teeth effect, apply a Skin Illustrator Palette activated with 99% alcohol to paint blackened or missing teeth.
More photos


Photos hosted by youtube.com.