Painted PumpkinsNo. 4426 · The 2026 edition
No Carve Eyeball Pumpkins Halloween Craft
Creepy no-carve eyeball pumpkins are a spooky twist on Halloween decor that’s easy and mess-free!
Our own summary of the original — the full post and photos live at dreamalittlebigger.com.
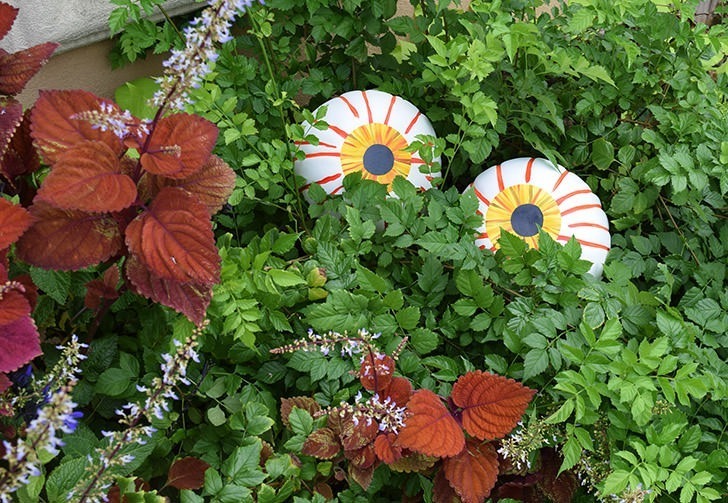
Transform white pumpkins into ghoulish eyeballs using paint, paper, and Mod Podge. Follow 7 simple steps to create bloodshot eyes with colorful irises that are perfect for indoor or outdoor display.
You'll need
Directions
- If your white pumpkins have an off-white tint, paint the bottom half with white paint a few days ahead of time.
- Decide if you want the eyeballs on the top or bottom of the pumpkins, keeping the stem placement in mind if using them to anchor in bushes.
- Measure the desired iris size for your pumpkins. Use a round object like a mason jar or drinking glass to trace and cut out two iris shapes from paper.
- Paint lines across the paper cutouts in similar hues plus one contrasting color. Let the paint dry, or speed it up with a blow-dryer.
- Trace and cut out the black pupil portion. Use outdoor Mod Podge to glue it into the center of the painted iris.
- With red paint, draw bloodshot veins following the pumpkin's natural ridges. Make some lines reach the iris and others stop short.
- Apply outdoor Mod Podge to attach the eyeballs to the pumpkin bottoms. Then coat the paper tops a few times to seal and reinforce.
More photos


Photos hosted by dreamalittlebigger.com.





