Painted PumpkinsNo. 9073 · The 2026 edition
Sugar Skull Pumpkins to Celebrate Día de los Muertos
Transform a simple pumpkin into a vibrant Día de los Muertos tribute with this easy DIY sugar skull project.
Our own summary of the original — the full post and photos live at ehow.com.
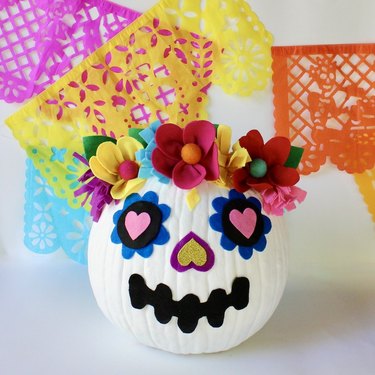
This guide walks you through painting a pumpkin white, sealing it for durability, and decorating it with colorful felt flowers, metallic accents, and traditional sugar skull motifs to create a festive holiday centerpiece.
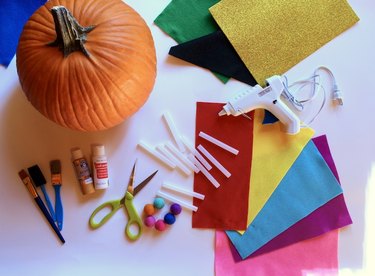
You'll need
Directions
- Lay down a protective barrier, such as a plastic tablecloth or a sheet of cardboard, over your workspace to prevent paint from staining surfaces.
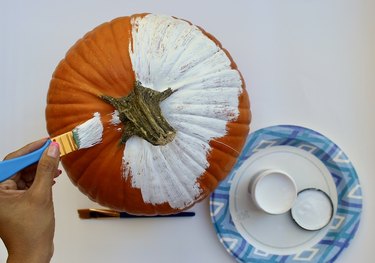
- Cover the entire pumpkin in white acrylic paint. Instead of dragging the brush in long strokes, use a stippling motion by dabbing the bristles repeatedly. A medium-sized pumpkin will require roughly 3.5 fluid ounces of paint to achieve full coverage.
- Once the white base coat has completely dried, brush on a layer of clear craft sealer. This protective coating helps keep dust and grime at bay, which is especially useful if you plan to display the finished piece outdoors.
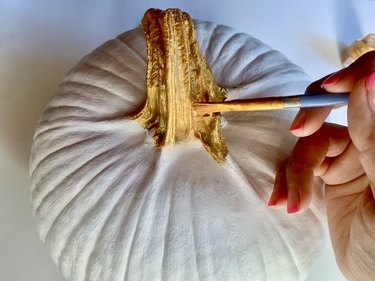
- Use gold acrylic paint or a metallic calligraphy pen to color the pumpkin stem. This adds a gleaming accent that complements the traditional sugar skull aesthetic.
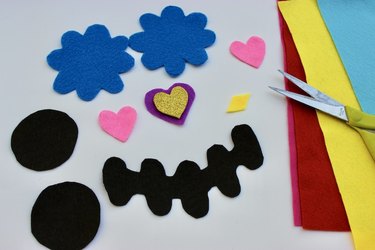
- Trace and cut out the facial features from your felt or sparkly foam sheets. For the eyes, draw two identical flowers. For the eye sockets, cut two matching circles, ideally in black. For the nose, cut two hearts of different sizes—one slightly smaller (about 1 cm) than the other—so they can overlap. For the mouth, sketch five rounded rectangles on the felt with approximately 1/2 cm gaps between them, draw a connecting line through the shapes, and cut them out to form the jawline.
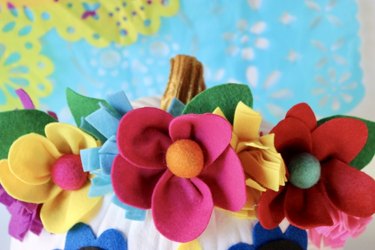
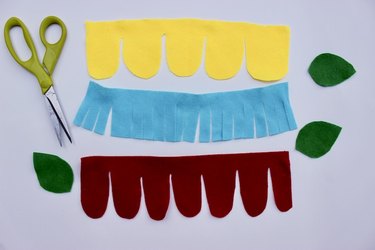
- Craft a floral crown inspired by Frida Kahlo's iconic style. Cut felt strips in various colors and petal shapes, including some with rounded edges and others with fringed ends. Twist each strip into a bloom shape and attach it using hot glue, wire, or thread. Place contrasting pom-poms in the center of select flowers to add depth and visual contrast.
- Position all the cut-out pieces on the pumpkin, using a pencil to mark their placement before adhering them. Once everything is secured, arrange your creation near your front door or on a mantel, and consider adding papel picado to complete the festive display.
More photos
Photos hosted by ehow.com.





