Painted PumpkinsNo. 3513 · The 2026 edition
Werewolf Pumpkin with FolkArt Acrylics
Transform a simple pumpkin into a fearsome werewolf with acrylic paint and foam—perfect for Halloween!
Our own summary of the original — the full post and photos live at plaidonline.com.
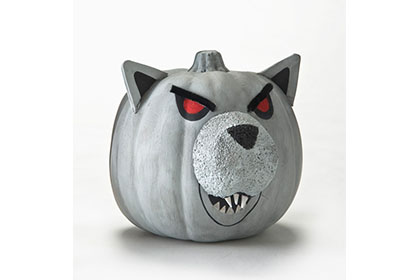
This project shows how to craft a werewolf pumpkin using gray and licorice acrylics, white foam ears and teeth, and a styrofoam snout. The step-by-step instructions cover painting, shaping, and assembling the face for a spooky, creative decoration.
You'll need
Directions
- From the white foam sheet, cut four triangular shapes to serve as ears. Pair them up and attach each pair with hot glue to create thicker, doubled ears. Trim a curved notch at the base of each ear so they sit flush on the pumpkin.
- Slice the styrofoam ball into two equal halves. Take one half and roll it on its side, shaping it into a thick tube. Using your fingers, press a triangular indent into one side—this becomes the bottom of the snout. Create a second indent that runs from that bottom point, around the tip, up to the top of the snout, just below where the nose will go.
- Apply a base coat of Dove Gray to the pumpkin, snout, and ears. Wait for it to dry completely. Then, using a dry brush technique, apply Licorice paint all over the pumpkin and snout.
- Decide where to attach the snout. With a liner brush, paint a U-shaped mouth in Licorice, ensuring the ends extend beneath where the snout will cover them. Slightly inside the U, fill the mouth cavity with more Licorice paint. Let it dry.
- Paint some white craft foam triangles with Wicker White to create teeth. Then hot glue these foam teeth into the bottom edge of the snout.
- Use Licorice to paint the nose, eyes, and inner ear surfaces. Let dry. Then apply Calico Red paint to the inside of the eyes.
- Attach the ears and snout to the pumpkin with hot glue. Cut a piece of black pipe cleaner slightly longer than the eye width and glue it over each eye.





