Candies & ChocolatesNo. 2280 · The 2026 edition
Chocolate Caramel Pumpkins
Create adorable chocolate pumpkins with a gooey caramel center, coated in orange candy melts for a festive treat!
Our own summary of the original by Beth Klosterboer — the full post and photos live at hungryhappenings.com.
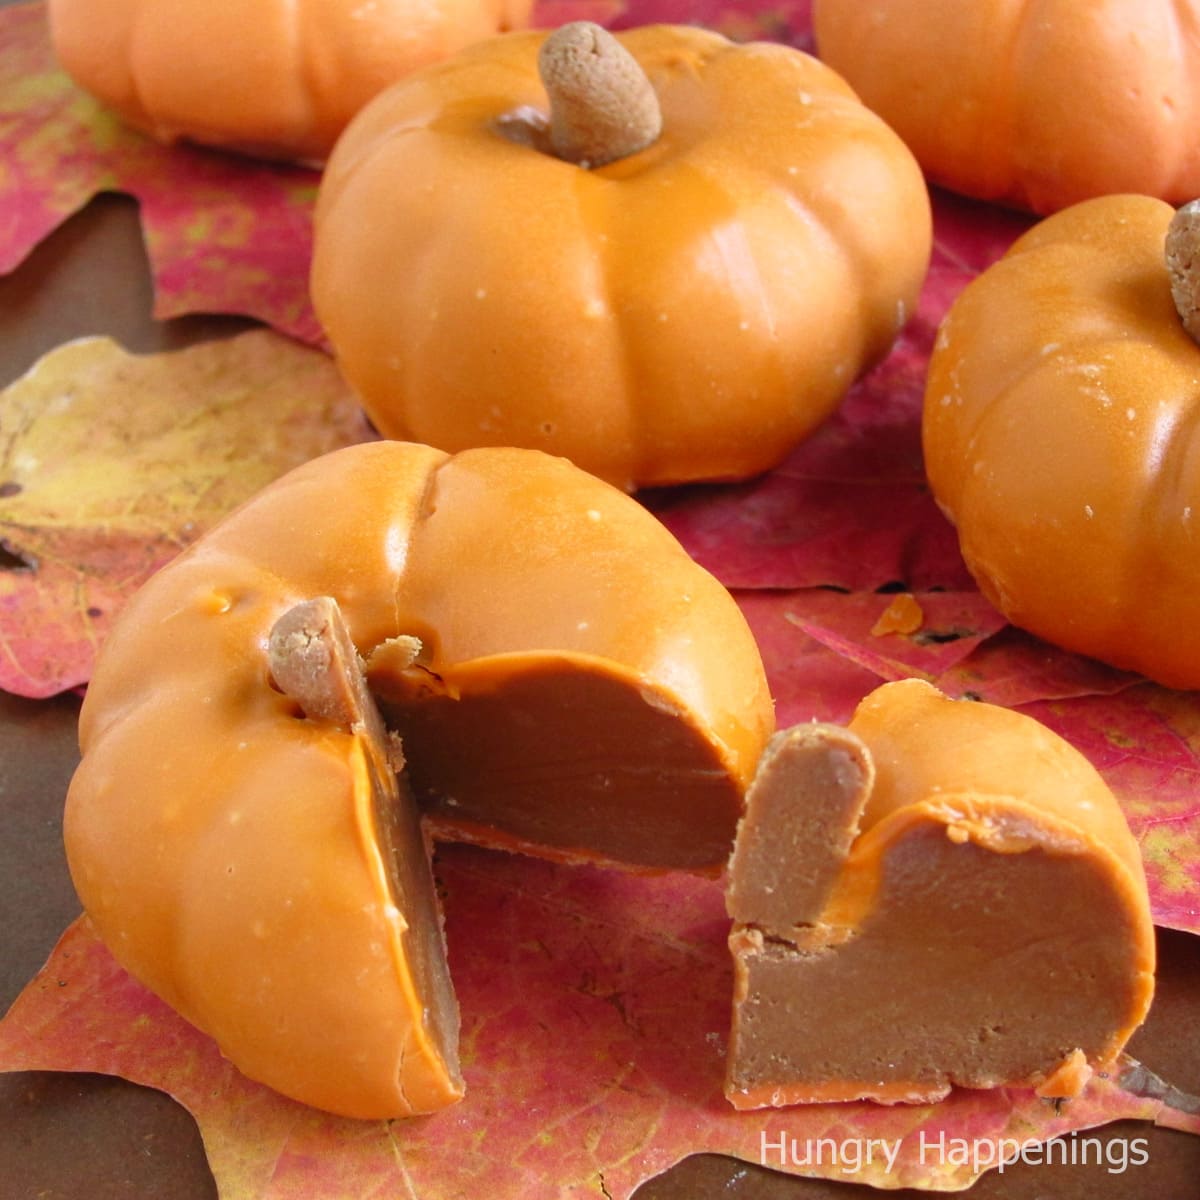
These Chocolate Caramel Pumpkins combine rich milk chocolate and dulce de leche into a fudge-like base, shaped into mini pumpkins. They are then dipped in orange candy melts for a crisp shell and finished with a tiny fudge stem. Perfect for Halloween, this no-bake recipe yields 9 charming, bite-sized sweets.
Ingredients
Directions
- Place the finely chopped milk chocolate or chocolate chips into a microwave-safe bowl.
- Microwave on high in 15- to 30-second bursts, stirring thoroughly between each, until completely melted and smooth.
- Let the melted chocolate cool until it reaches 90-92°F, checking with a thermometer.
- Add the Dulce de Leche and stir just until combined, being careful not to overmix or the fudge may become greasy.
- Wrap the mixture tightly in plastic wrap and let it rest at room temperature for at least 30 minutes.
- Unwrap the fudge and knead it with your hands for about 30 seconds until it becomes smooth and pliable.
- Divide the caramel chocolate fudge into 9 equal pieces, setting aside a heaping tablespoon for the stems.
- Roll each of the 9 pieces into a ball, then flatten them slightly into a pumpkin shape, and press a small indentation in the center of the top.
- Use a knife to carve shallow grooves from the indentation down to the bottom of each pumpkin.
- Gently widen the grooves with the back of the knife to create a more defined pumpkin appearance.
- Divide the reserved fudge into 9 tiny pieces and roll each into a short log shape to form the stems.
- Pour the orange candy melts (or orange-colored white candy melts) into a microwave-safe bowl.
- Microwave on high for 40 seconds, then remove and stir.
- Microwave on high for another 30 seconds, then let the bowl sit in the microwave for 1 to 2 minutes.
- Take the bowl out and stir the melts vigorously until smooth.
- If needed, heat in additional 10- to 15-second increments, stirring after each, until fully melted and fluid.
- Line a baking sheet with parchment paper or a silicone mat (like a Silpat).
- Spread a thin layer of the melted orange candy coating onto the bottom of each chocolate pumpkin.
- Allow the bottom coating to harden completely.
- Dip a pumpkin into the orange candy melts, ensuring it's fully covered, then lift it out using a fork.
- Tap the fork against the side of the bowl several times to let excess coating drip off.
- Make sure to clear any extra candy melts from the indentation on top of the pumpkin.
- Place the coated pumpkin on the prepared baking sheet.
- Press one of the reserved fudge stems into the indentation while the coating is still soft.
- Repeat steps 20-24 until half of the pumpkins are dipped and stemmed.
- Refrigerate the sheet for about 10 minutes until the coating is set.
- Reheat the remaining candy coating in the microwave in 10- to 15-second bursts, stirring between, until it's fluid again.
- Continue dipping the rest of the pumpkins and attaching their stems.
- Chill the finished pumpkins in the refrigerator until the coating is fully firm.
- Let the pumpkins sit at room temperature for at least 30 minutes before packaging or serving.
Per serving
- 528.0 calories