Living SpacesNo. 9609 · The 2026 edition
Halloween Decorations
Transform a simple frame into a spooky masterpiece with this DIY mesh art project featuring classic Halloween motifs.
Our own summary of the original — the full post and photos live at theidearoom.net.
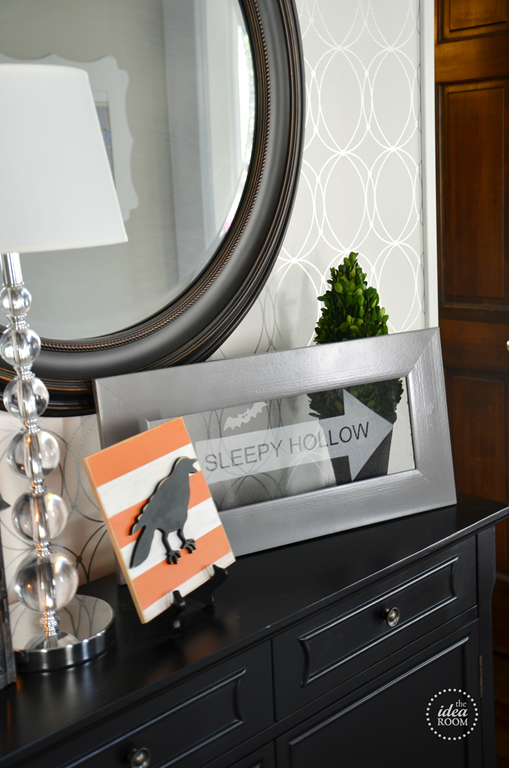
This project guides you through creating a custom Halloween decoration using a picture frame and window screen. By painting the mesh black and adding white stenciled designs like arrows and bats, you can personalize the piece with vinyl cutouts and custom text. The final result is a stretched, stapled mesh artwork perfect for seasonal display.
You'll need
Directions
- Cut the mesh to dimensions that will cover the rear of the frame, ensuring there is enough excess material to stretch it taut and secure it with staples.
- Apply a coat of black spray paint to the mesh. If the frame requires a color change, paint it as well. Allow both items to dry fully before proceeding.
- Position an arrow stencil on the mesh and spray it with white paint. Add a bat shape using a separate stencil and white paint. If you are incorporating vinyl cutouts from a Silhouette machine, place them now and let everything dry thoroughly.
- Apply word stencils, such as 'SLEEPY HOLLOW' or any custom phrase you prefer. For the arrow design, reposition the remaining vinyl pieces to cover the black sections, then remove the letter cutouts to expose the mesh for painting.
- Paint the exposed letters black. Once the paint is completely dry, remove the vinyl stencils. Finally, stretch the mesh over the back of the frame and staple it securely in place.