Decoupage & GlitterNo. 1259 · The 2026 edition
Beautiful Blue And White Chinoiserie Pumpkin DIY
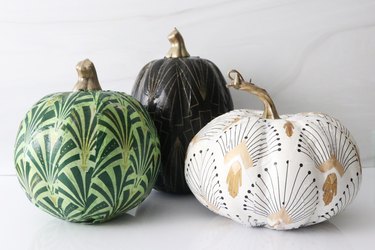
Give your Halloween decor a touch of elegance with a chic blue-and-white chinoiserie pumpkin made from napkins and Mod Podge.
Our own summary of the original — the full post and photos live at stonegableblog.com.

This DIY project uses a white pumpkin, matte Mod Podge, and a chinoiserie-patterned cocktail napkin. The napkin is separated into layers, applied in sections, and smoothed onto the pumpkin's surface. The stem is removed during the process and then reinserted after the pumpkin dries completely.
You'll need
Directions
- Trim the cocktail napkin into a circle that measures roughly two-thirds of the pumpkin's height.
- Peel apart the napkin layers, keeping just the top ply that has the chinoiserie design.
- Gently pull the stem off the pumpkin.
- Brush a layer of matte Mod Podge onto the upper third of the pumpkin.
- Center the tissue circle over the pumpkin's top, aligning its middle with the stem hole.
- Apply Mod Podge over the tissue, pressing gently. Use a finger with a dab of Mod Podge to smooth out any wrinkles.
- Cut the unglued tissue hanging down into strips using scissors.
- Attach each strip to the pumpkin with Mod Podge, smoothing with brush and finger. Slightly overlap the strips and trim off any extra.
- After all side strips are glued and dry, flip the pumpkin upside down.
- Cut and tear more tissue to cover the lower half of the pumpkin, applying Mod Podge. Complete this section with a final piece using the same method.
- Allow the pumpkin to dry fully.
- Use the blunt end of a small paintbrush to reopen the top hole, then reinsert the stem.
More photos


Photos hosted by stonegableblog.com.