Decoupage & GlitterNo. 4452 · The 2026 edition
DIY Decoupage Tissue Paper Pumpkin
Transform a plain pumpkin into a colorful, textured masterpiece using tissue paper and decoupage.
Our own summary of the original — the full post and photos live at sarahhearts.com.

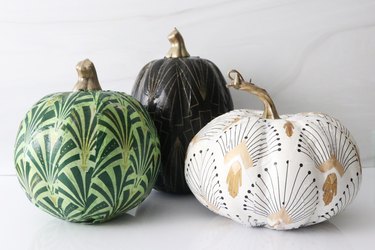
This DIY project turns a simple pumpkin into a decorative piece by painting it white, then layering torn tissue or decoupage paper with decoupage medium. The result is a custom, patterned pumpkin perfect for fall decor.
You'll need
Directions
- Apply a base coat of white multi-surface craft paint to the entire pumpkin, using a paint brush. Depending on coverage, you may need two coats; a hair dryer can speed up drying between layers.
- Work on the pumpkin in small sections. Using a foam brush, spread a thin layer of decoupage medium onto a section, then tear a piece of tissue or decoupage paper and place it on the coated area. Immediately brush another coat of decoupage medium over the paper, smoothing out any wrinkles with your fingers. Repeat around the entire pumpkin, overlapping pieces as desired. Allow the pumpkin to dry completely, then apply a final overall coat of decoupage medium.
More photos


Photos hosted by sarahhearts.com.