Tools & TechniquesNo. 6749 · The 2026 edition
How to Carve the Perfect Pumpkin
Learn expert tips for picking, carving, and preserving the perfect Halloween pumpkin with this step-by-step guide.
Our own summary of the original — the full post and photos live at scaryproducts.com.
From selecting a ripe, blemish-free pumpkin to carving intricate designs and preserving your creation, this guide covers everything you need for a stunning jack-o'-lantern. Follow these steps to ensure safe carving, optimal illumination, and long-lasting results. With the right tools and techniques, you'll create a memorable Halloween decoration.
You'll need
Directions
- Pick a pumpkin that is fully orange, ripe, and without any bruises, cuts, or soft spots. Choose the size based on your intended design: medium for stencils, large for intricate patterns, small for classic faces. Look for a smooth front and a sturdy stem. Keep the uncut pumpkin in a cool, dry spot and, before carving, wash it with a solution of 1 gallon water mixed with 1 teaspoon chlorine bleach.
- Assemble your tools: old newspaper, masking tape, a sharp chef's knife (6–8 inches), thin-bladed serrated knives or saws, a large strong spoon, a sharp-tipped marker, and an ice-pick or sharp nail. Optional items include a pumpkin-carving kit, a PowerMaster Power Saw, or a Monster Scoop.
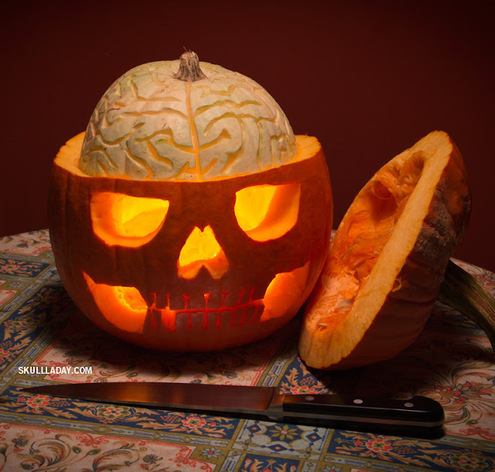
- Slice off the top of the pumpkin around the stem. The opening should be about two-thirds the width of the pumpkin. Cut a five- or six-sided lid, angling the knife inward so the lid is cone-shaped and won't fall inside. If you plan to use a candle, poke a small vent hole in the back of the lid.
- Using a large spoon or a specialized scoop, remove all seeds and stringy membrane from the interior. Leave the walls about 1 inch thick. Scrape the bottom flat so a candle sits level. Wash and dry the outside of the pumpkin.
- Get or make a stencil for your design. Cut out the stencil and tape it to the pumpkin with masking tape. Transfer the design by poking small holes along the lines with a pin, or score the skin with a utility knife. For extra visibility, you can rub flour over the pumpkin so the dots show up better.
- Carve the small parts first, working from the center outward. Use a sawing motion with a small serrated saw—never a straight-edge knife. To make corners, remove the saw and reinsert it at a new angle; push cut-out pieces out with your fingers. For smoother lines, cut edges at an angle. You can also carve small designs on the back for shadow effects or partially remove the skin for a different look.
- Light your pumpkin with battery-powered lights for safety, or use votive candles in glass holders placed inside. For medium to large pumpkins, use two or three candles for better glow. Never leave a lit candle unattended. Optionally, sprinkle cinnamon, nutmeg, and pumpkin spice on the lid to create a seasonal scent.
- To preserve your carved pumpkin, first wash your hands and tools with antibacterial soap. Spray the finished pumpkin with Lysol to kill bacteria. Rub petroleum jelly over all cut surfaces to seal in moisture. Alternatively, use a product like Pumpkin Fresh. If the pumpkin shrivels, soak it in water overnight to rehydrate.


:max_bytes(150000):strip_icc()/2377901_pumpk-17187-0f84c59d00204ebf8ae7e102120d6ebf-d64ae9eedd9045b2a3004dfc82fab1d5.jpeg)

