Kids CraftsNo. 9774 · The 2026 edition
Popsicle Stick Halloween Gnome Craft
Our own summary of the original by Stacey Gibbon — the full post and photos live at gluedtomycraftsblog.com.

You'll need
Directions
- Let the fun begin! Start by setting the stage for spooky creativity—clear off your craft table and lay out all your supplies.
- Take three popsicle sticks (you’ll need three per Halloween gnome) and grab your craft paint supplies.
- Squeeze a bit of your chosen paint color onto a paper plate.
- Using a paintbrush, completely paint all three popsicle sticks.
- Once painted, glue the sticks together in a triangle shape using school glue.
- Set your popsicle stick triangle aside and let it dry completely. Repeat for as many ghoulish gnomes as you’d like to create!
- While the triangles dry, grab your patterned scrapbook paper and scissors.
- Cut a triangular piece of scrapbook paper to serve as the gnome’s body, which will fit inside the popsicle stick frame.
- From the colored cardstock, cut out a long, flowing beard, a triangle hat, a glittery nose, and any other fun embellishments you can imagine.
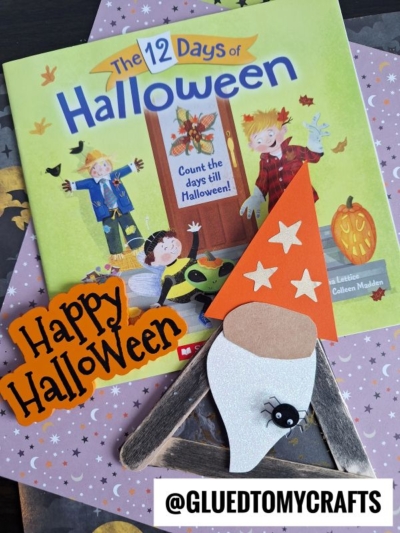
- To assemble your Popsicle Stick Halloween Gnome, glue the paper triangle to the back of the popsicle stick frame for the body. Then, attach the beard, hat, nose, and other accents to the front of the frame using school glue.
- Enhance the spooky vibe with extra details like pumpkin or spider stickers, glitter, or other embellishments to give your gnome a festive flair.
- Once everything is in place, allow your gnome to dry completely before proudly displaying it.
- Don’t forget to share your creations with us on social media using #gluedtomycrafts—we’d love to see your spooky masterpieces!
More photos


Photos hosted by gluedtomycraftsblog.com.