Lanterns & LuminariesNo. 9540 · The 2026 edition
Halloween Decor: How to Make Glowing Specimen Jars
Transform ordinary jars into eerie specimen containers with a glowing, bug-infested look perfect for Halloween.
Our own summary of the original — the full post and photos live at hgtv.com.
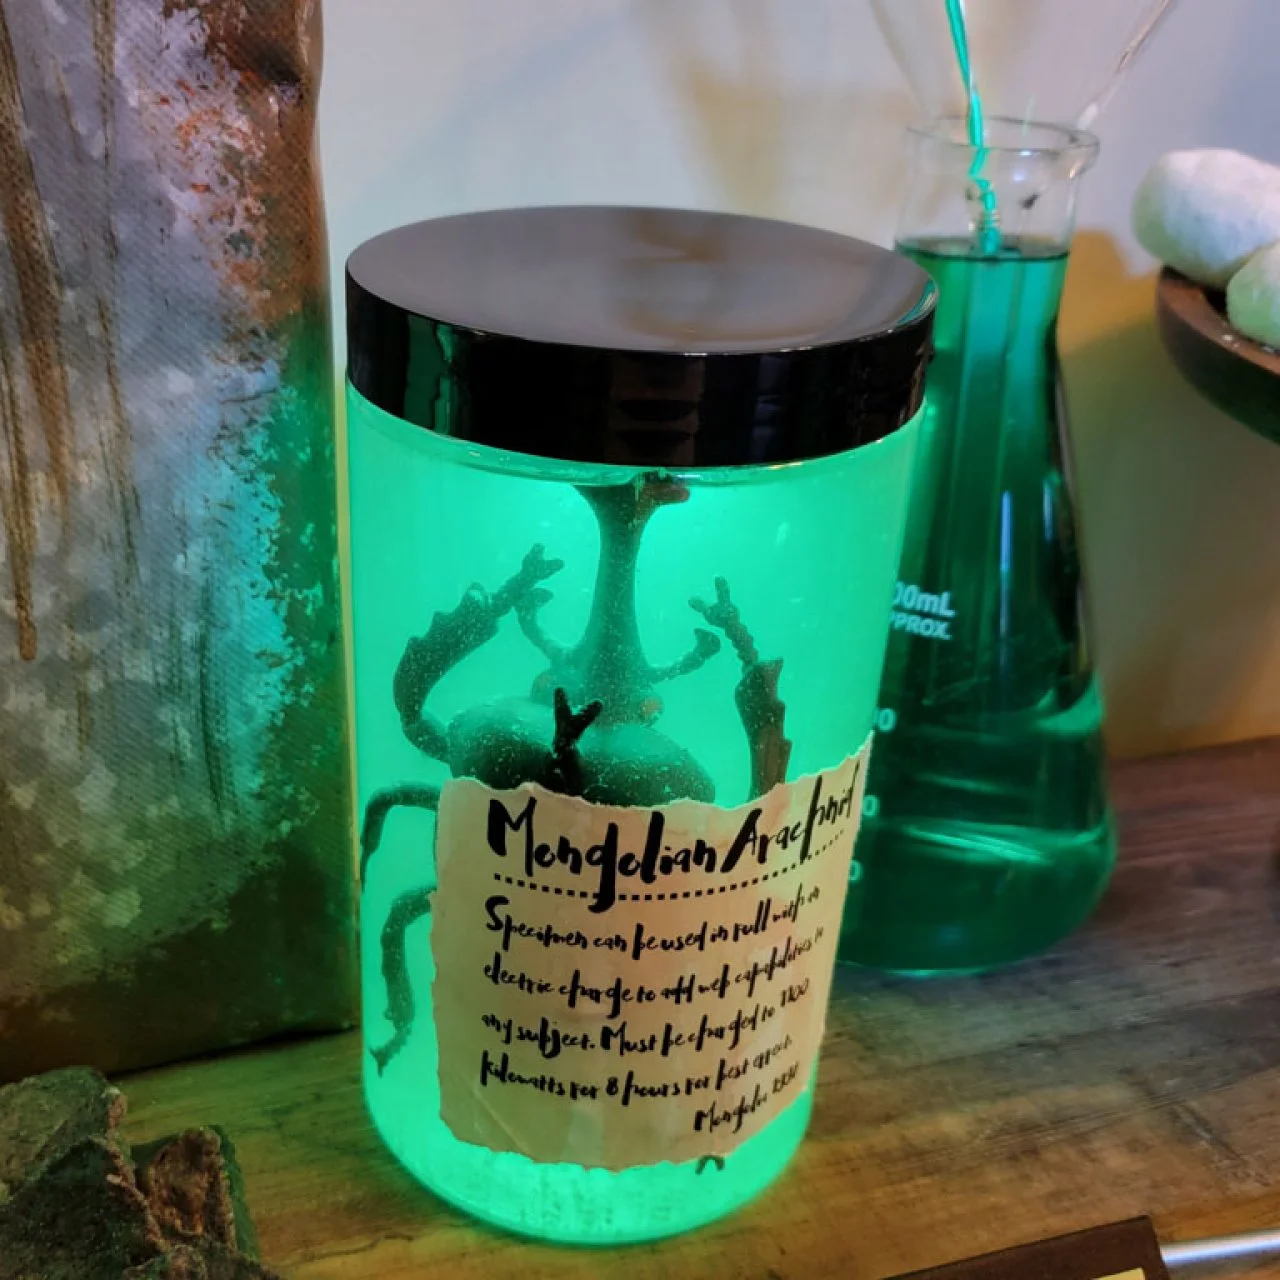
Create glowing specimen jars using plastic containers, distilled water, neon-green paint, and remote-controlled lights. Add large plastic bugs and aged labels to complete the haunting effect.
You'll need
Directions
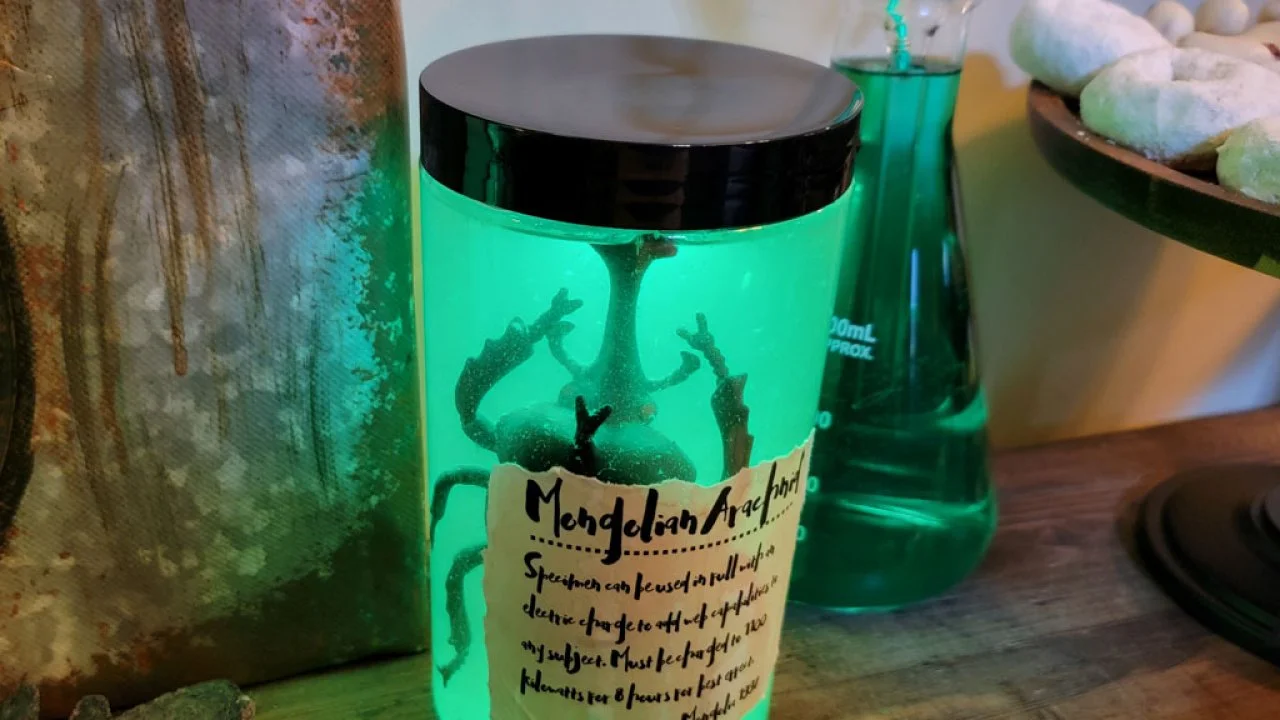
- Start by washing your jars and lids thoroughly, peeling off any stickers or residue. Pour distilled water into each jar until it's nearly full—this type of water resists mold for about a month. Then add 2 to 3 drops of neon-green acrylic paint and mix with a stir stick.
- Place a single large plastic bug into each jar. A bigger bug looks better than multiple small ones.
- For a spooky glow, attach waterproof remote-control LED lights to the inside of each lid using a hot glue gun. Screw the lids on and test the lights. Make sure the water touches the lights; otherwise, you'll see a reflection instead of a glow.
- Print the specimen jar labels onto shipping label paper. While holding a label upright, use a straw to drip coffee down it to create an aged, gnarly effect. Let the coffee dry completely, then tear the edges to give the label a worn appearance. Affix the labels to the jars.
- Switch on the lights in each jar and enjoy the eerie glow.
More photos



Photos hosted by hgtv.com.