Zombies & UndeadNo. 9371 · The 2026 edition
HALLOWEEN Make-up : Zombie
Transform into a terrifying zombie with this step-by-step makeup guide using bold reds, blacks, and realistic wound effects.
Our own summary of the original — the full post and photos live at deea-makeup.blogspot.com.

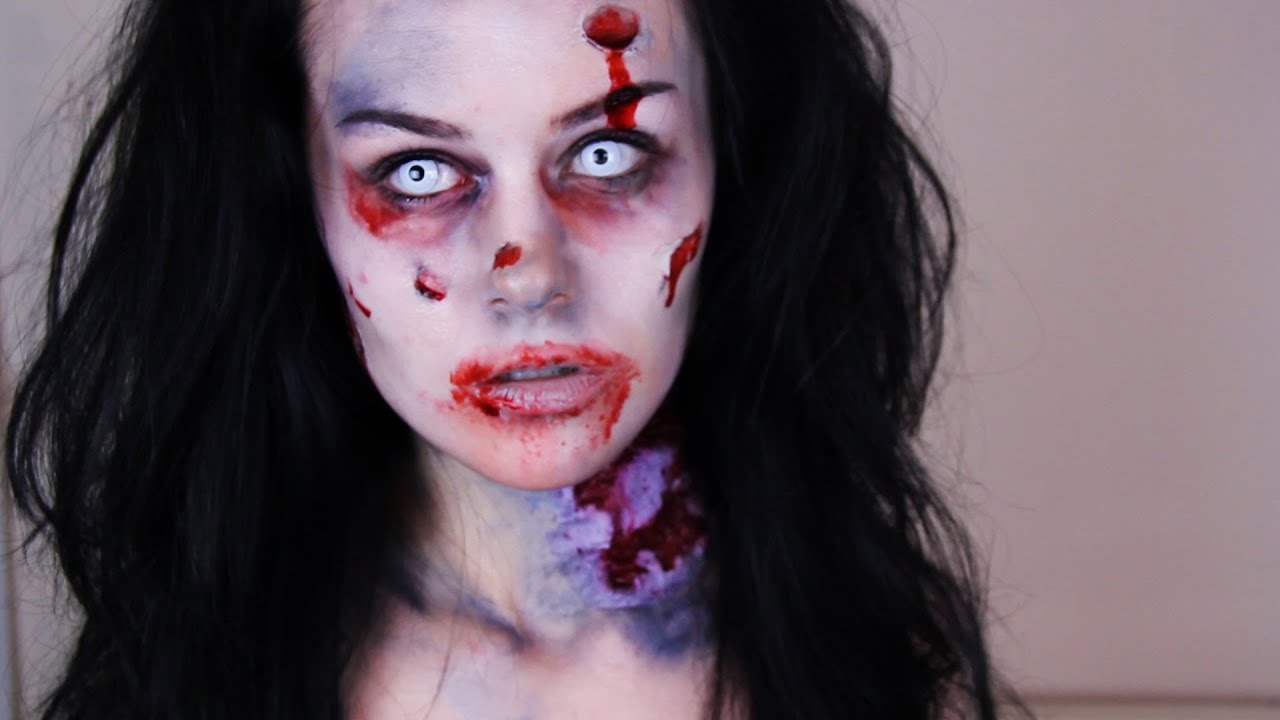
This zombie makeup tutorial starts with a neutral base and contouring to create a sunken look. Then dramatic red and violet eyeshadow is applied, followed by defined eyes and bold red lips. Finally, realistic wounds are drawn and shaded to complete the undead effect.
Directions
- Start by applying the Sleek palette primer (the shade shown in the image) all over your face.
- Next, use the Coastal Scents 78 color palette: apply shade 1 to the center of your face and shade 2 around the edges.
- Contour your face and cheekbones using a black eyeshadow to create a dark, sunken effect.
- Move to the eyes: apply red eyeshadow (shade 3 from the Beauties Factory 88 palette) to both upper and lower lids, extending down toward the cheekbones. Then define the eyelids and especially the inner corner with violet eyeshadow (shade 4 from the Coastal Scents 78 palette), blending well with the red.
- Brush your eyebrows upward to give them a messy, disheveled look.
- Apply MAC Carbon intense black eyeshadow to further outline and define the eyes.
- Put on a bold red lipstick, then add black eyeshadow to the corners of the lips and blend it with the lipstick.
- Choose where to place the 'wounds' to balance the heavy eye and lip makeup against a plain forehead. Draw the wounds with a lip liner, then deepen them using a thin brush and black eyeshadow. Repeat the same process on the lips and chin.
More photos


Photos hosted by deea-makeup.blogspot.com.

:max_bytes(150000):strip_icc()/ft_halloween00mummy_xl-ae1f5e5d14894ff19087602782eacf0f.jpg)