21+ — flagged for gore
Zombies & UndeadNo. 6557 · The 2026 edition
Spirit Halloween’s Ultimate Zombie Makeup Tutorial
Transform into a zombie with this step-by-step makeup tutorial using liquid latex and prosthetics!
Our own summary of the original — the full post and photos live at spirithalloween.com.
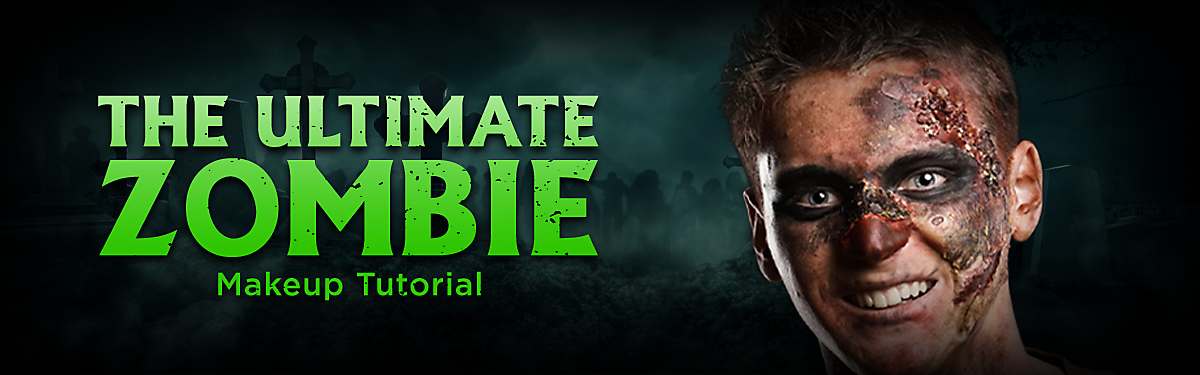
This tutorial teaches you how to create a realistic zombie look using liquid latex and prosthetic wounds. You'll learn to apply and blend the prosthetics, add dimension with shadows and cream makeup, and finish with fake blood for a gory effect. Perfect for Halloween!
Directions
- Spread thick coats of liquid latex onto your skin using a makeup sponge and allow it to dry completely.
- While the liquid latex is drying, brush spirit gum onto medium-sized prosthetic wounds or cuts and let it become tacky. Then press the prosthetic onto your skin and hold for 30 seconds.
- Brush a layer of liquid latex over the prosthetics to help them lie flatter on your skin. You may need to apply multiple layers.
- Carefully use your fingers, tweezers, or eyebrow scissors to gently pull apart the dried liquid latex, creating small holes.
- With a makeup sponge or your fingers, gently blend the edges of the prosthetics and latex into your skin for a seamless transition.
- Grab your Halloween makeup palette and use black eyeshadow to add definition and shadows around your cheekbones, lips, neck, eyes, cuts, and more. Get creative!
- Add depth with layers of grey, white, and black cream makeup over the black outlines. Use white to highlight the center of your face and neck, and yellow to create a bruised, sunken look around eyes and cuts.
- Finish by applying fake blood to your liquid latex and prosthetic wounds.
:quality(85):extract_cover()/2014/10/17/848/n/1922153/2b757995a5b450e0_thumb_temp_cover_file23876211413486166.jpg)

:max_bytes(150000):strip_icc()/ft_halloween00mummy_xl-ae1f5e5d14894ff19087602782eacf0f.jpg)