Kids CraftsNo. 2233 · The 2026 edition
DIY Halloween Treat Bags
Our own summary of the original — the full post and photos live at scatteredthoughtsofacraftymom.com.

You'll need
Directions
- Cut fabric into pieces, measuring 15 inches by 5 3/4 inches.
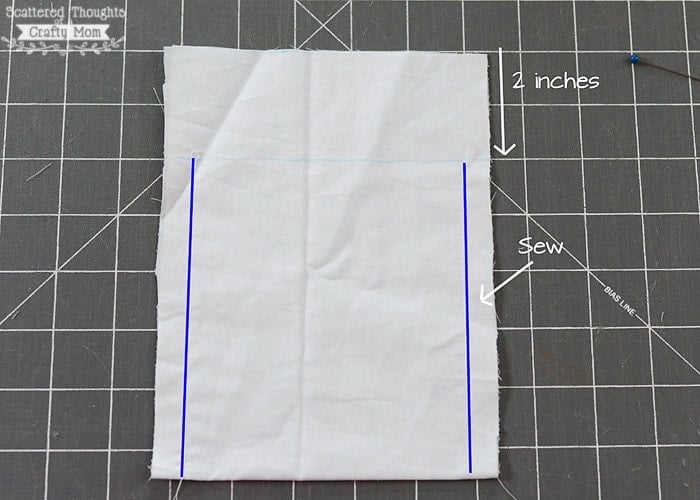
- Fold fabric in half, right sides together. Measure 2 inches down from the top and draw a line with a disappearing ink fabric marker.
- Sew along the sides of the bag, 1/2 inch from the edge, up to the line you drew. Back stitch a few times at the top to help secure the bag.
- Fold the top edges of the bag over 1/2 inch. (towards the center of the bag.) Press with iron if needed, though you can probably get away with “finger pressing.”
- Fold the top over 1/4th inch, then fold over again so the edge of the folded top is even with the line you drew. Repeat for the other side.
- Pin in place and sew along the bottom of the fold to create the casing. Don’t forget to back stitch. Take care to not sew stitches through the other side/casing.
- Trim edges.
- Flip bag right side out and press.
- Use a safety pin to pull string/ribbon through both casings. Trim strings and use fray check as needed.
- Decorate as desired.
More photos




Photos hosted by scatteredthoughtsofacraftymom.com.